Styling the Chat Component
- Refactor with flexbox
- Make it look fancy
In this lesson, we just change our styling to use more of flexbox. This will set us up for our next lesson where we display the recent activity of our users.
Update styles
Before we get much further, we should update the style of our Chat component and our Sidebar so we can display things in a way that looks normal to a user. For starters, we're going to change around our Chat component so that our elements are no longer absolutely positioned to demonstrate different ways of aligning items and we're going to take this opportunity to show a few more features of flexbox.
After updating our styles, we're going to want a chatroom that looks something like the image below.
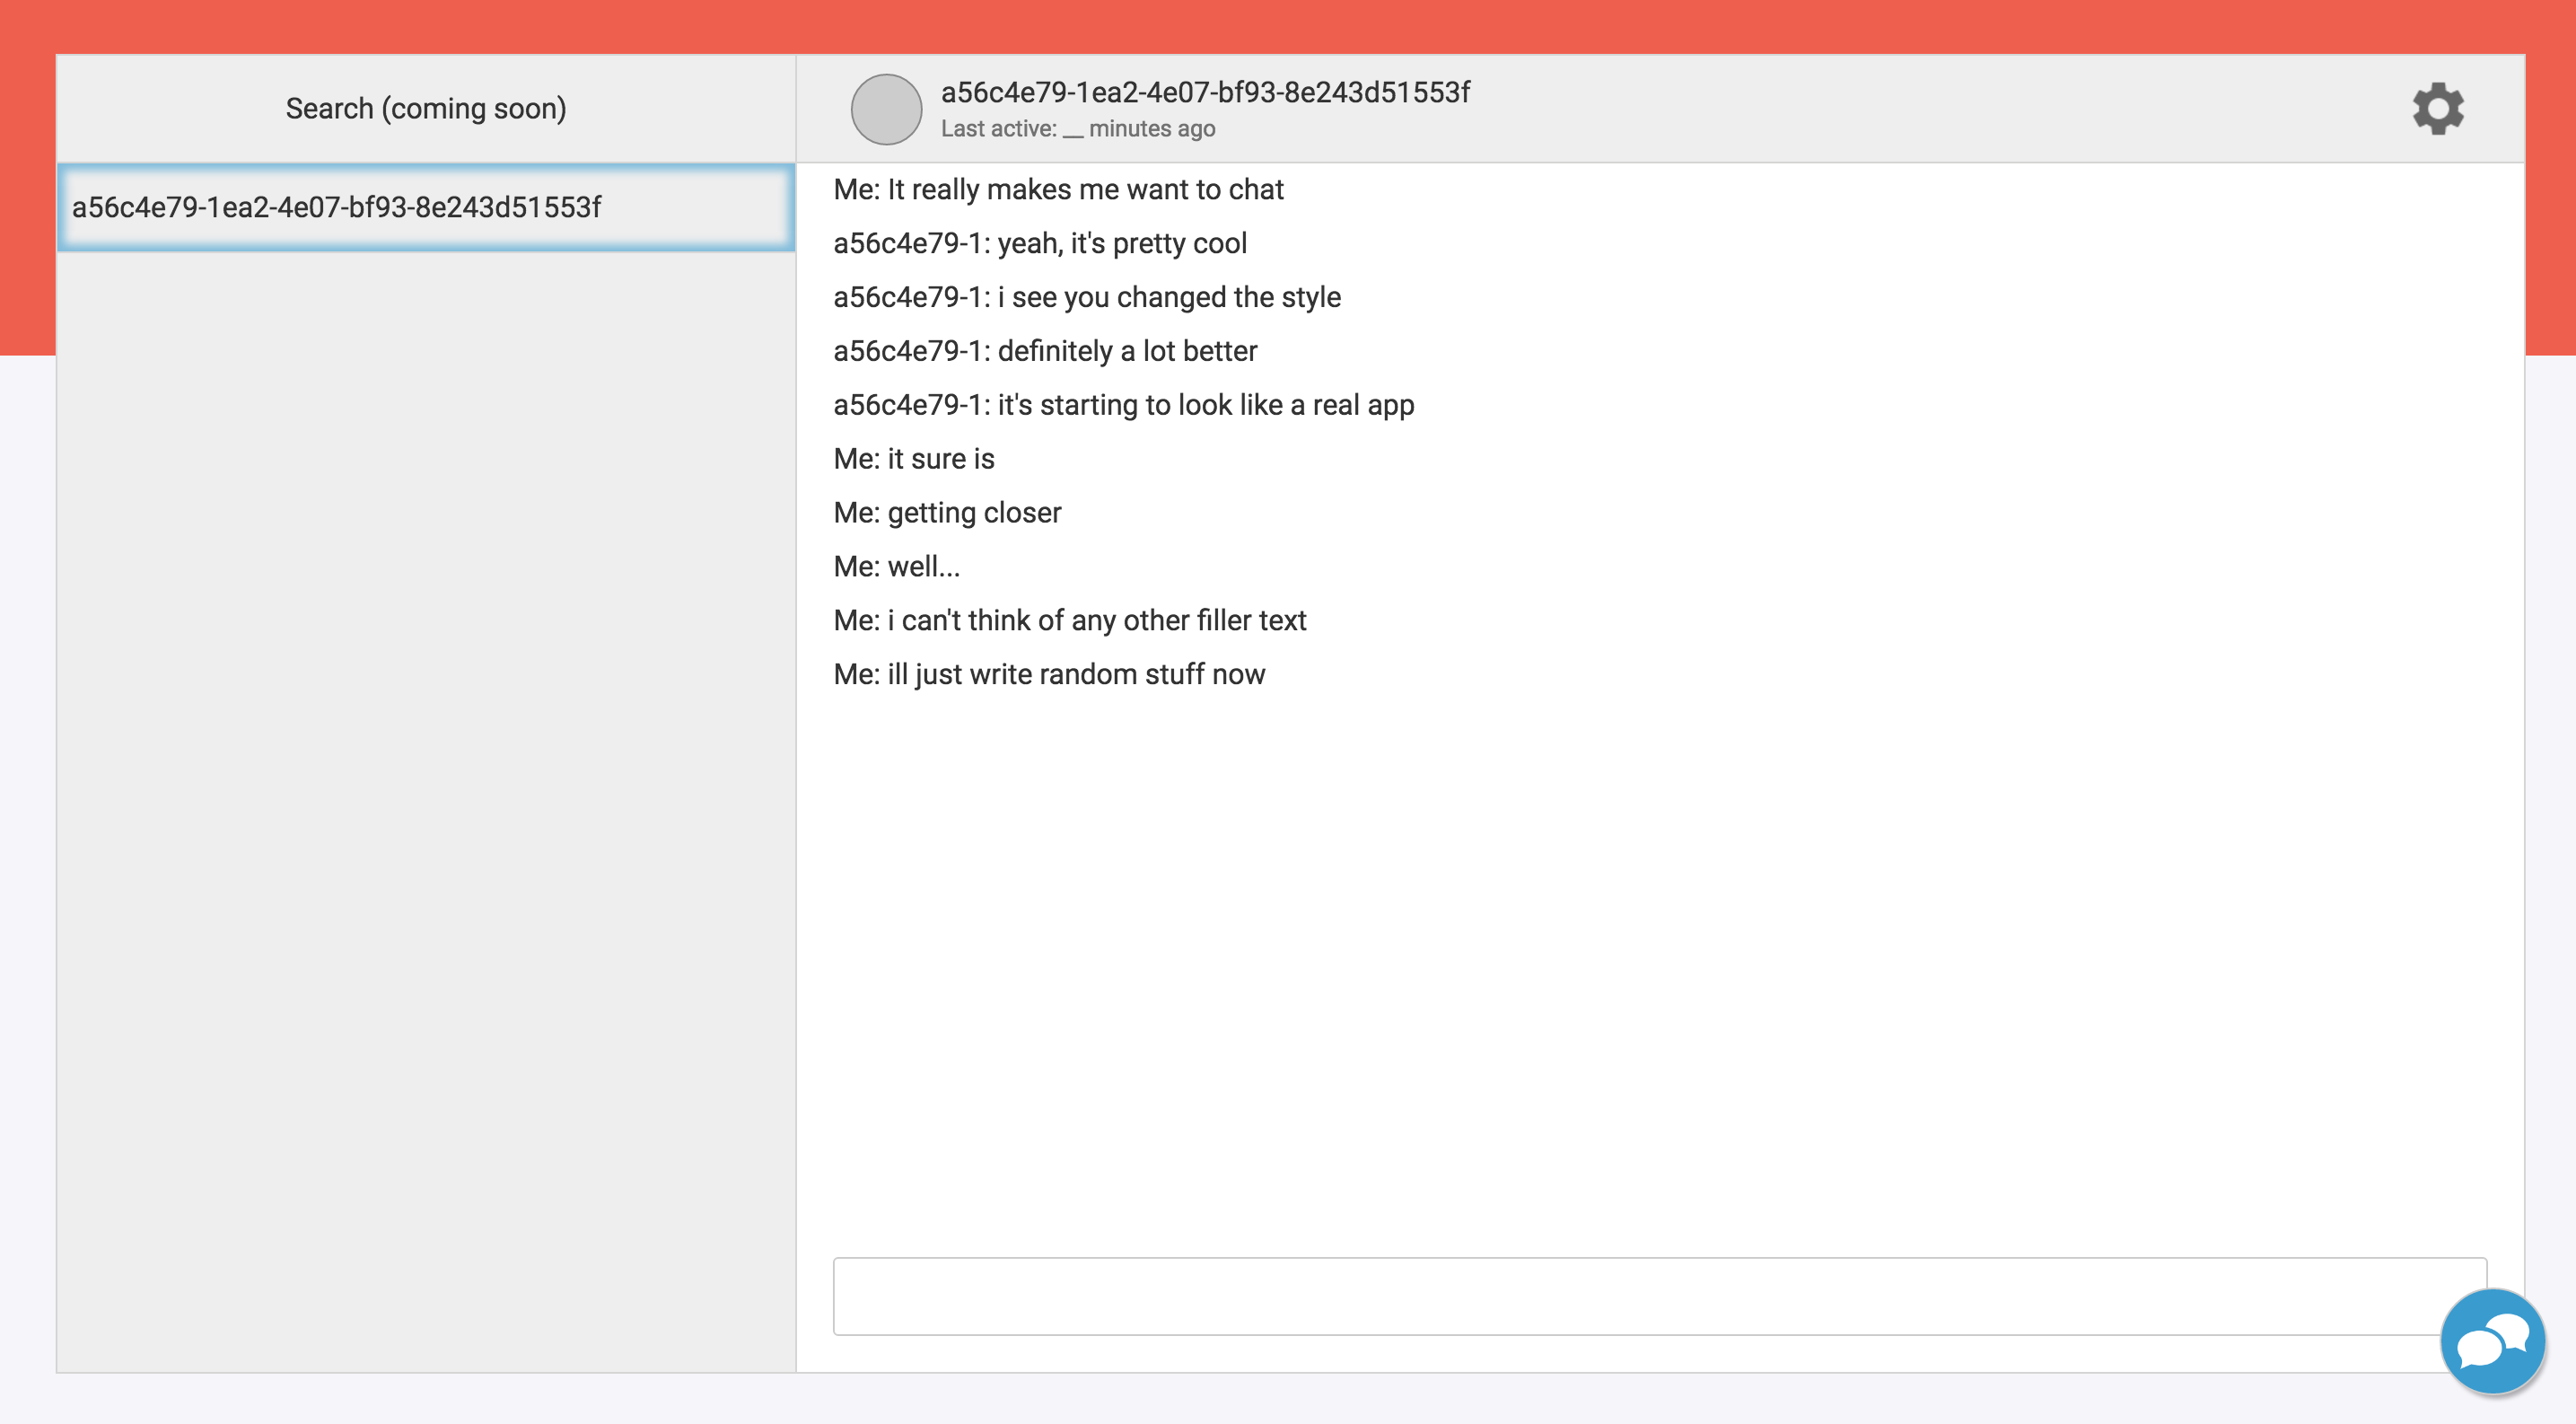
Although you generally don't want to mess with your App component, we're going to add some background styling to it since we want our entire app to live within this background to give us that fancy, subtle background color.
import React from "react"import cssModules from "react-css-modules"import { connect } from "react-redux"import style from "./style.css"import Actions from "../../redux/actions"export class App extends React.Component { componentDidMount() { this.props.dispatch(Actions.userAuth()) } render() { return ( <div className={style.background}> <div className={style.backgroundHeader} /> <div className={style.backgroundFooter} /> {this.props.children} </div> ) }}export default connect()(cssModules(App, style))So now we have three additional elements around our Chat component. The first one we'll just set to fixed and cover the entire app. Then we have a header, which we will color our theme red and a footer which we will color an off-white.
.background { position: fixed; top: 0; left: 0; height: 100vh; width: 100vw;}.backgroundHeader { position: absolute; top: 0; left: 0; right: 0; height: 200px; background-color: rgb(239, 95, 78);}.backgroundFooter { position: absolute; top: 200px; left: 0; right: 0; height: calc(100vh - 200px); background-color: rgb(245, 245, 250);}This will make our app look somewhat broken since our chat component does not have a background color.
Refactor Sidebar component
We're going to add a header to this component, which will eventually be used to filter/search through messages and we're going to change the positioning from absolute to flexbox. On the React-side, all we're doing is adding a header. On the CSS-side, changing the layout to a flex column.
...export const Sidebar = props => { return ( <div className={style.sidebar}> <div className={style.header}> Search (coming soon) </div> { renderList(props) } </div> )}...And now let's change the sidebar to a flex column with a width of 30%. We're also going to use a pattern from the awesome site Subtle Patterns to give our sidebar a little flare.
... .sidebar { display: flex; flex-flow: column nowrap; background: url("/learnphoenix-static-assets/images/swirl_pattern.png"); overflow-y: scroll; border-right: 1px solid rgb(213, 213, 213); width: 30%; position: relative;}.header { display: flex; justify-content: center; align-items: center; height: 60px; background: rgb(238, 238, 239); border-bottom: 1px solid rgb(213, 213, 213);}And now our app looks even more broken! Next we need to wrap our ChatRoom component and change the positioning of the items to use flexbox as well.
Refactor ChatRoom component
Since the elements in our ChatRoom component are mostly absolutely positioned, this is going to be a significant change. The first thing we need to do is wrap our input so we can position it properly, then we're going to wrap our chat component and set up flex rows and columns.
This app is basically just one row with two columns (one 30% width, and one 70% width). The first column is our Sidebar, which we already handled, and the second contains the header, our messages, and the input box.
First, let's wrap our whole Chat component with some padding to show a little bit of the background, and then wrap our other components in a row.
...export class Chat extends React.Component { ... render() { return ( <div className={style.container}> <div className={style.row}> <Sidebar presences={this.state.presences} lobbyList={this.state.lobbyList} onRoomClick={this.changeChatroom} /> <ChatRoom input={this.state.input} handleChange={this.handleChange} handleMessageSubmit={this.handleMessageSubmit} currentRoom={this.state.currentRoom} messages={this.state.messages} /> </div> { this.props.children } </div> ) }}...Now we're going to introduce our styles. These are pretty simple and bring to what is almost a functional app. The first wraps our chat component and pads it with 2rem so we show a little bit of the background behind our chat interface. It also centers it.
The .row is basically our entire app, so we're going to give it a white background and a border. The .column contains our header, our messages, and our input box.
.container { display: flex; justify-content: center; align-items: center; position: relative; height: 100vh; width: 100vw; z-index: 100; padding: 2rem;}.row { display: flex; flex-flow: row nowrap; height: 100%; width: 100%; border: 1px solid rgb(213, 213, 213); background: white;}The next step is to style our ChatRoom component. We're also going to add a header which we can fill in with content in a later lesson.
...export class ChatRoom extends React.Component { ... renderHeader() { return ( <div className={style.header}> Header (coming soon) </div> ) } ... render() { return ( <div className={style.container}> { this.renderHeader() } ... </div> ) }}...Then we should style the components in our chatroom.
.container { position: relative; display: flex; flex-flow: column nowrap; position: relative; width: 70%;}.header { display: flex; flex-flow: row nowrap; width: 100%; background: rgb(238, 238, 239); border-bottom: 1px solid rgb(213, 213, 213); height: 60px; display: flex; flex-flow: row nowrap; justify-content: space-between; align-items: center; padding-left: 10px;}.inputWrapper { padding: 0 20px 20px 20px;}.input { width: 100%; line-height: 40px; font-size: 16px; outline: none; border: 1px solid #ccc; border-radius: 3px; padding-left: 10px; color: #333;}At this point, the app is starting to come together quite nicely! But if you start typing messages, you'll see that the messages flow over behind our input box and our scrolling is all messed up. So let's add some more styles to fix that.
This is also where we introduce flex-grow. You'll often see flex: 1 used, which is shorthand for the following:
.style { flex-grow: 1; flex-shrink: 1; flex-basis: auto;}Spend a couple minutes looking through this and this from CSS-Tricks for a great intro to how the flex property is used. Since our header and input are fixed height, we want to be able to tell our messageWrapper to fill all the remaining vertical space within our row. Thank to flexbox, all we have to do is set flex-grow: 1.
/* ... */.chatWrapper { padding-top: 5px; flex-grow: 1; position: relative; overflow-y: scroll;}So now that our app is styled and works properly, let's add some more detail to our Sidebar.
